Training services
1. Task list
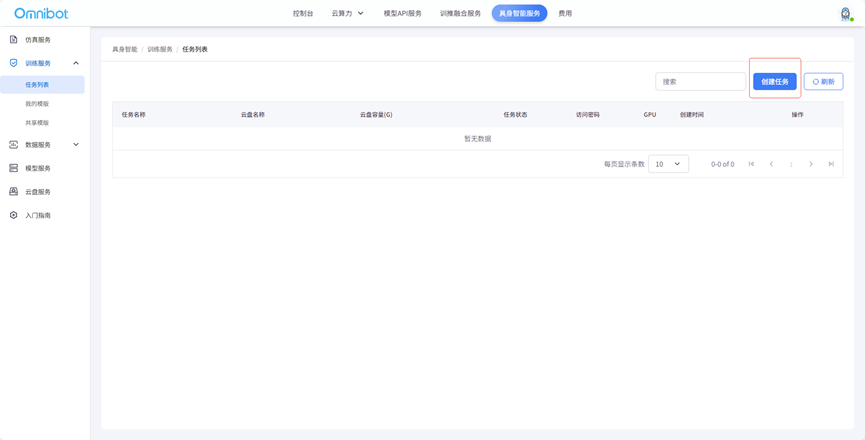
To create a task, click the "Create Task" button to go to the task creation page
Task Name (required) : In the "Task Name" input box, enter a recognizable name for the task to be created, which will be used for the identification and management of subsequent tasks. Label: You can add relevant labels to the "Label" input box according to the category and attribute of the task, so as to facilitate the subsequent classification and retrieval of the task. Description: In the "Description" input box, a brief description of the purpose, content, and expected results of the task is provided to provide reference for the execution and understanding of the task. 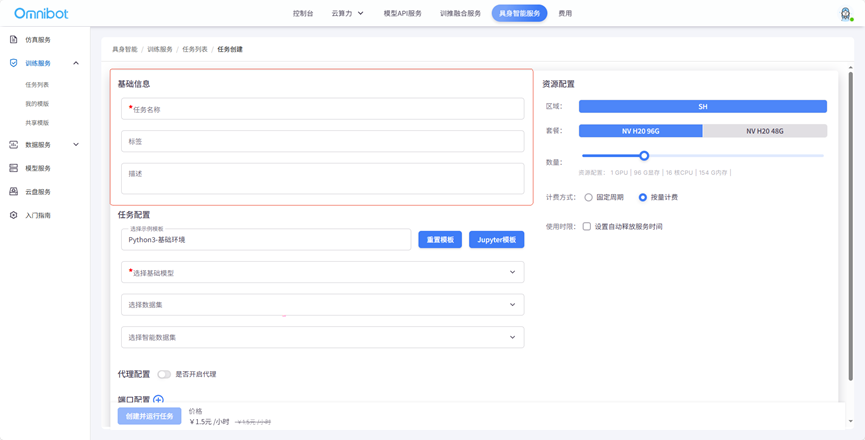
Select sample templates: The platform provides sample templates such as "Python3 - Basic environment", users can choose the appropriate template according to the task requirements. If you need to reset the template, you can click the "Reset template" button;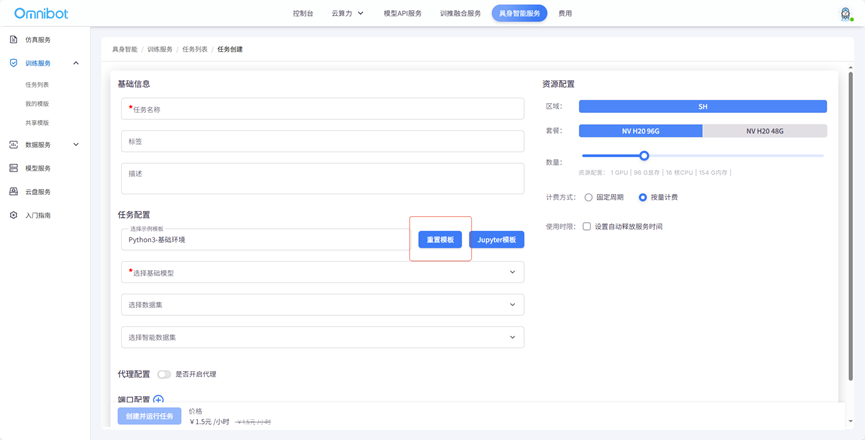
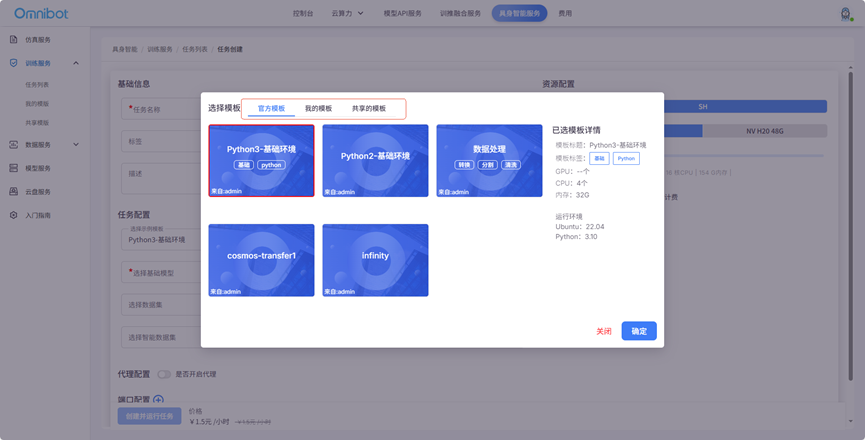
If you need to perform template-related operations based on Jupyter, you can click the "Jupyter Template" button. The template has "official template", "My template" and "shared template" to choose from 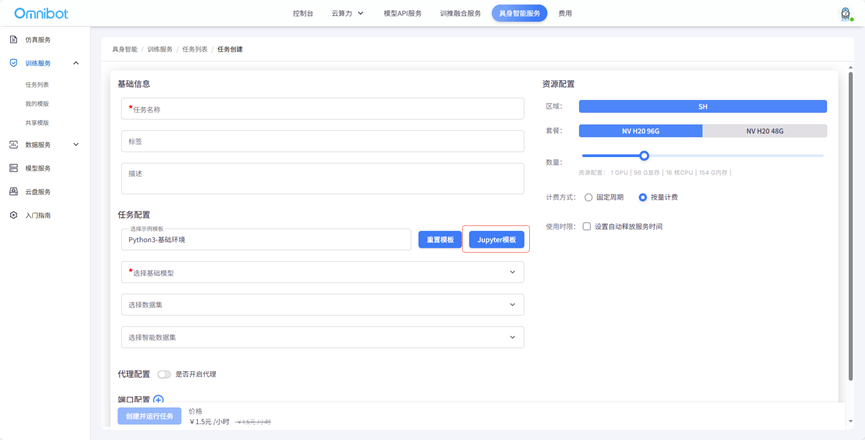
Select the base model (required) : Click the "Select Base Model" drop-down box to select the model suitable for the current task from the list of base models provided by the platform.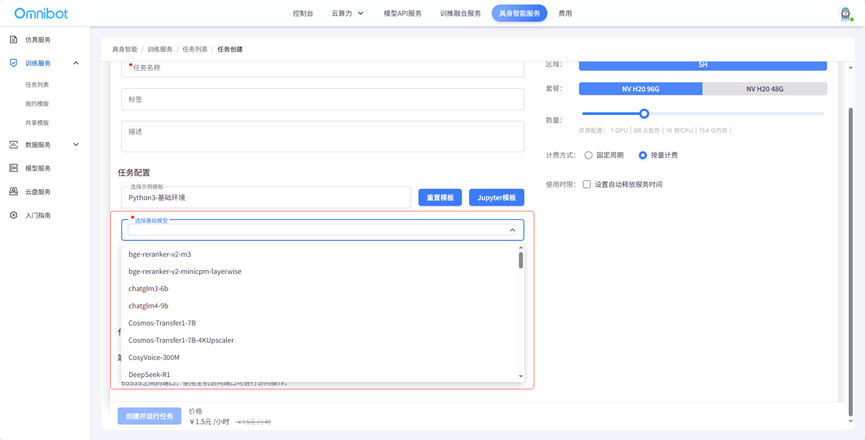
Select dataset: In the "Select Dataset" drop-down box, select the dataset relevant to the task to provide data support for model training or inference.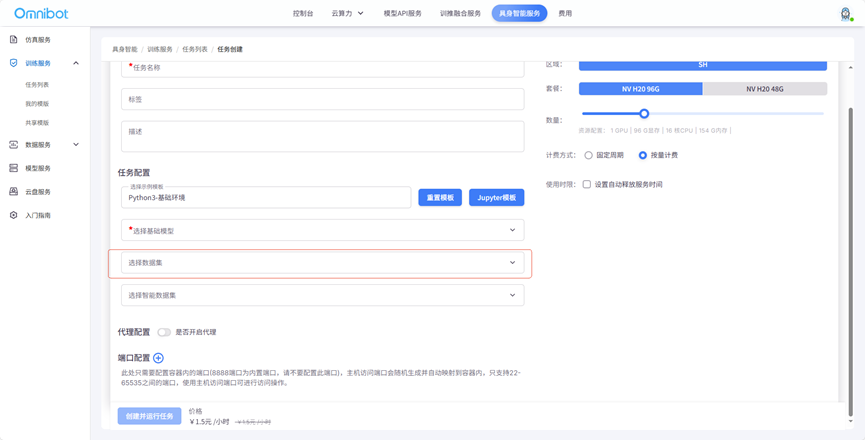
Select smart dataset: If the task requires a specific smart dataset, you can select it in the "Select Smart Dataset" drop-down box.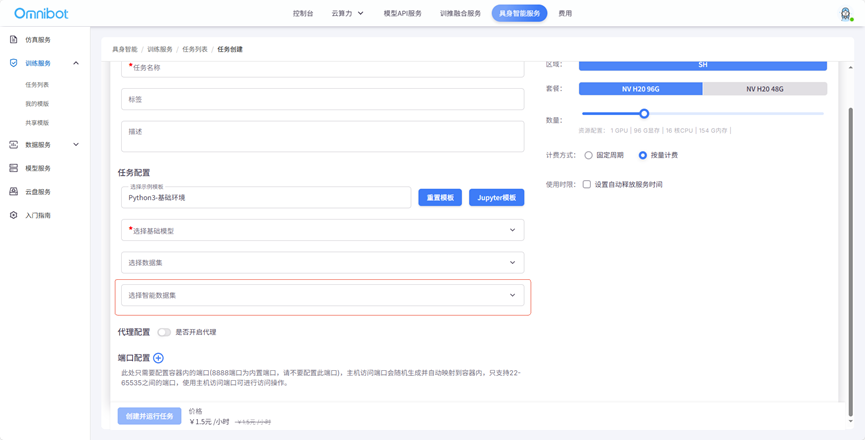
Select whether to enable the agent function according to the actual needs. If enabled, it is necessary to complete the relevant agent parameter Settings according to the platform guidelines. 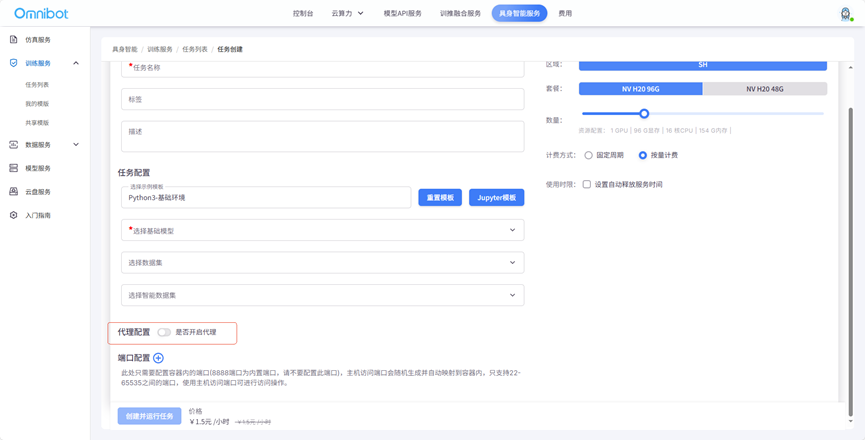
Here it is used to configure the port inside the container (Note: port 8888 is a built-in port, do not configure this port). The host access port will be randomly generated and automatically mapped into the container. Only ports between 22 and 65535 are supported, and the host access port can be used for access operations. 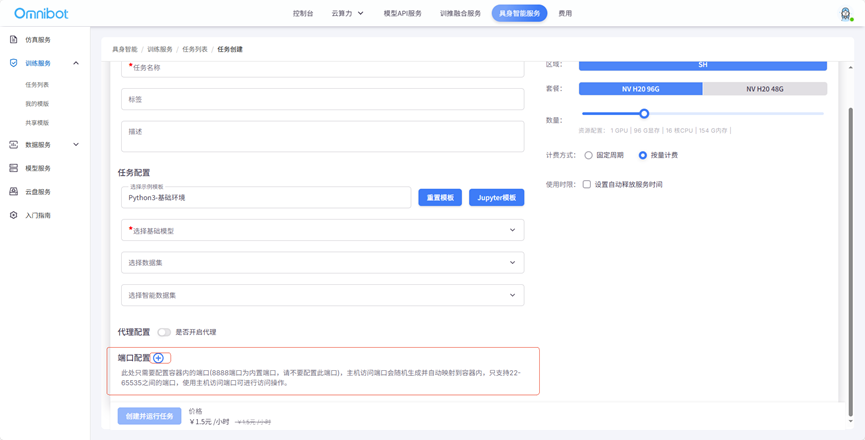
Region selection: In the "Region" option, select the appropriate region (such as "SH" in the example) according to the geographical location requirements of the task execution. Package selection: The platform provides packages with different configurations (such as "NV H20 96G" and "NV H20 48G" in the example), and the user can select the corresponding package according to the computing resource requirements of the task. Quantity adjustment: By dragging the quantity slider, set the required amount of resources, and view the corresponding resource configuration (such as GPU, video memory, CPU, memory and other information). Billing mode: It provides two billing modes: "fixed period" and "meter-based", and users can choose according to the execution cycle of tasks and resource usage. Time limit: If you need to set the automatic release service time, you can check the "Set automatic release service time" and set the corresponding time. Network disk: If you need to use cloud disk, you can check "Fcloud cloud disk".
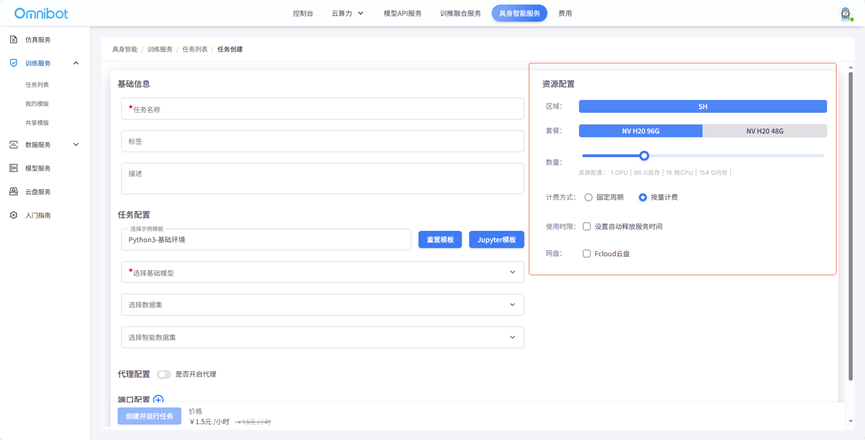
After completing all the above configuration, click the "Create and execute task" button to start the task. At the same time, the price information of the task can be viewed at the bottom of the page (such as 1.5 yuan/hour in the example). 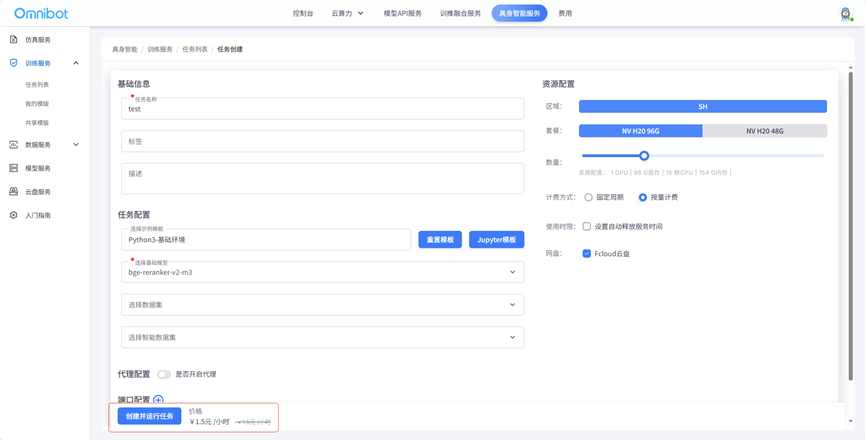
After the task is completed, it needs to wait for resource allocation, which is displayed in waiting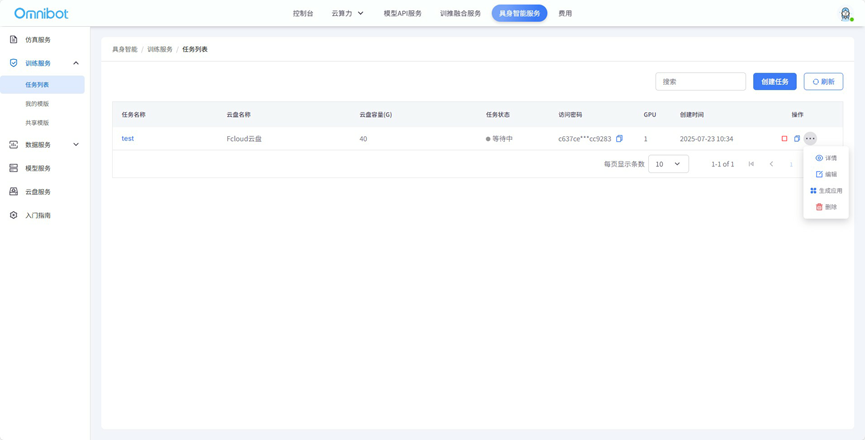
After the resource allocation is completed, the task is displayed as running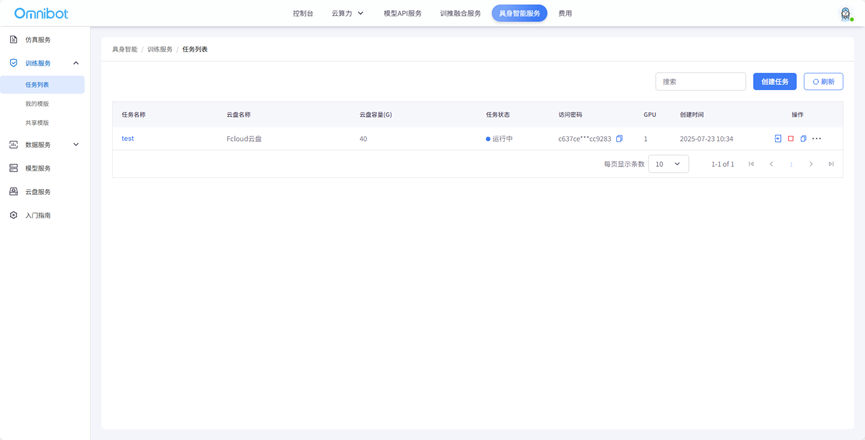
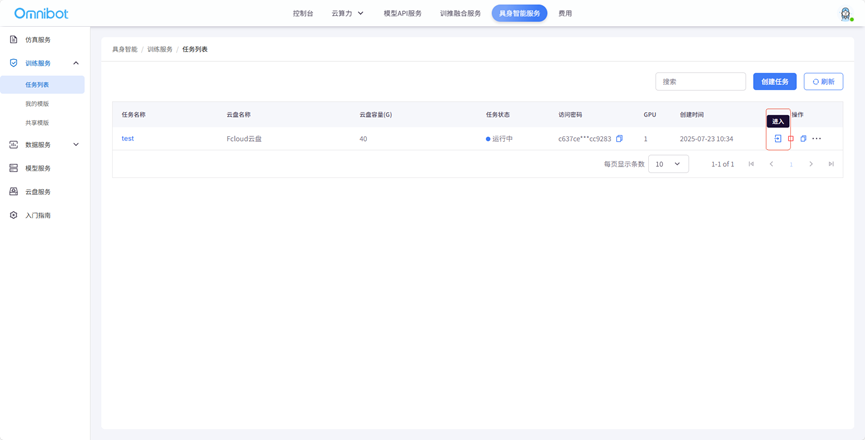
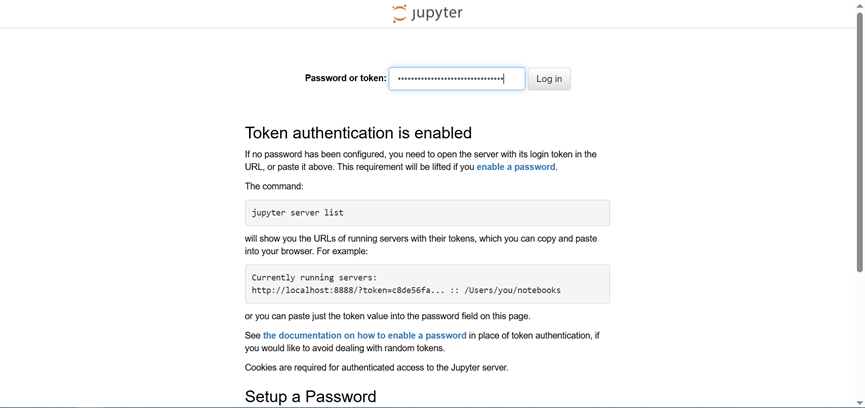
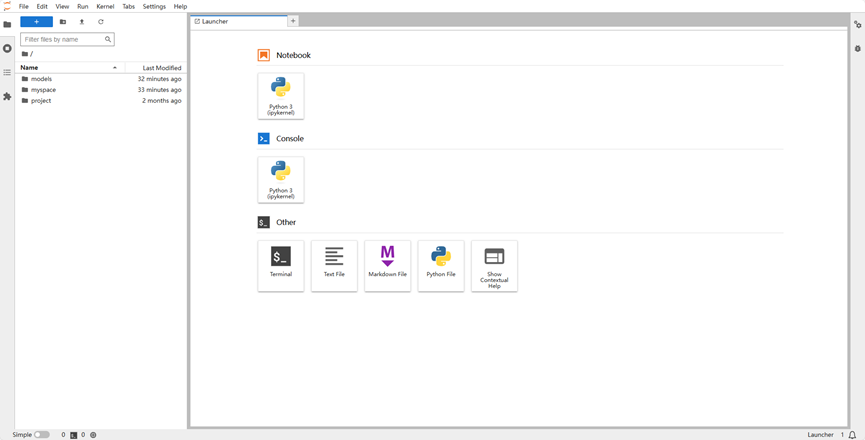
In the task entry area, copy the "Access password", find the operation button with the "Enter" logo, enter the "access password" and click "Login" to enter the task operation page. 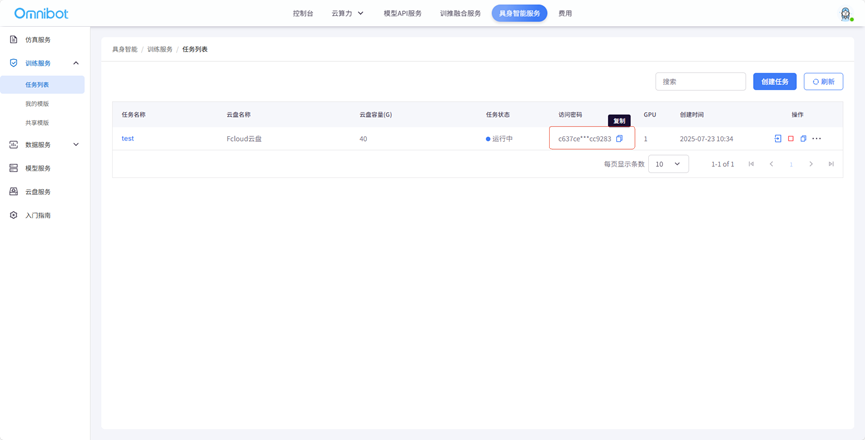
When the user needs to pause the task execution, find the "Stop" button in the task entry operation area and click on it. The system will send a stop instruction to the task, and the task will gradually terminate its execution according to its own stop mechanism. After stopping the task, the user can decide whether to restart the task or perform other operations according to the actual needs. 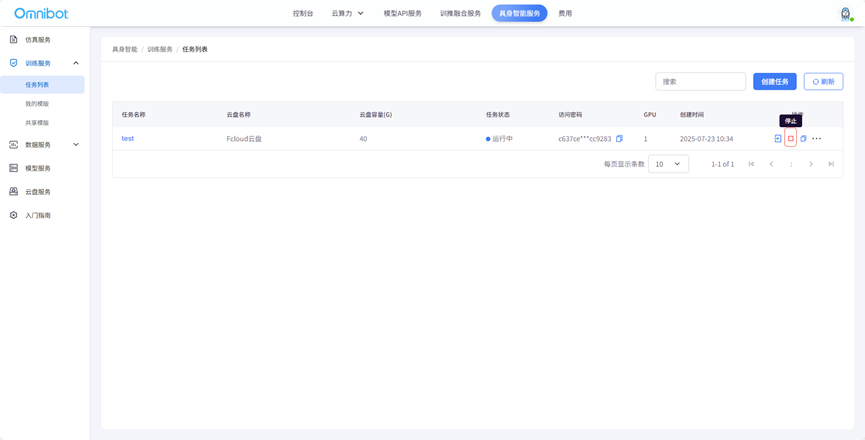
If users need to create a new task with a similar configuration to an existing task, they can use the "copy" function. Click the "Copy" button in the operation area of the task entry, and the system will automatically copy the relevant configuration information of the current task. On the basis of copying, users can modify part of the configuration, quickly complete the creation of new tasks, and improve the efficiency of task configuration. 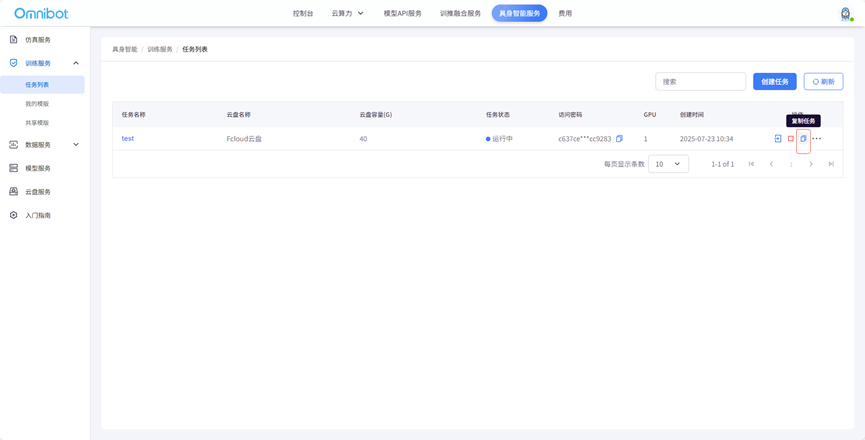
Click "... "in the operation area of the task entry. Button, will pop up more operation options menu, which contains "details", "Edit", "Save as template", "assign application", "Delete" and other functions. 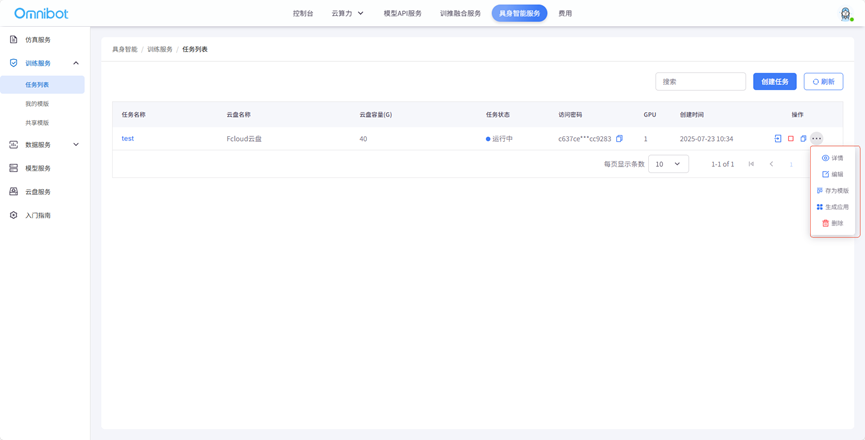
Details: Click to view more comprehensive task-related information than the "Enter task" page, including task details, running logs, monitoring and other content. 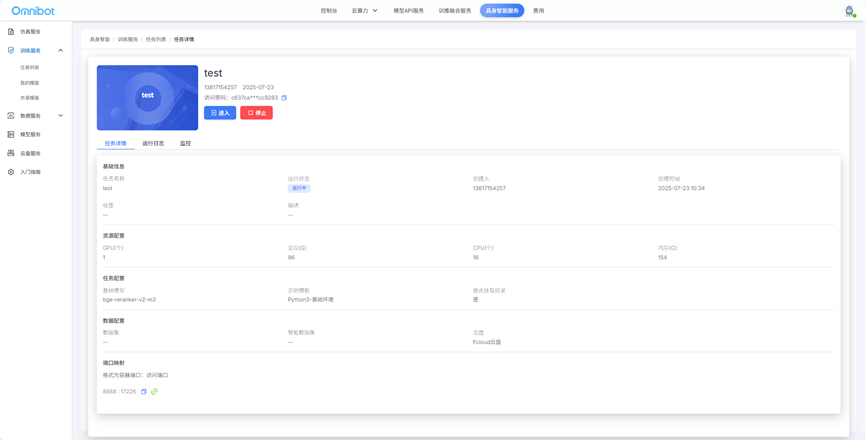
Edit: After selecting this option, users can modify and adjust the configuration parameters of the task, such as the basic information of the task, task configuration, agent configuration, port configuration, etc. After the modification is completed, save it to make the new configuration take effect.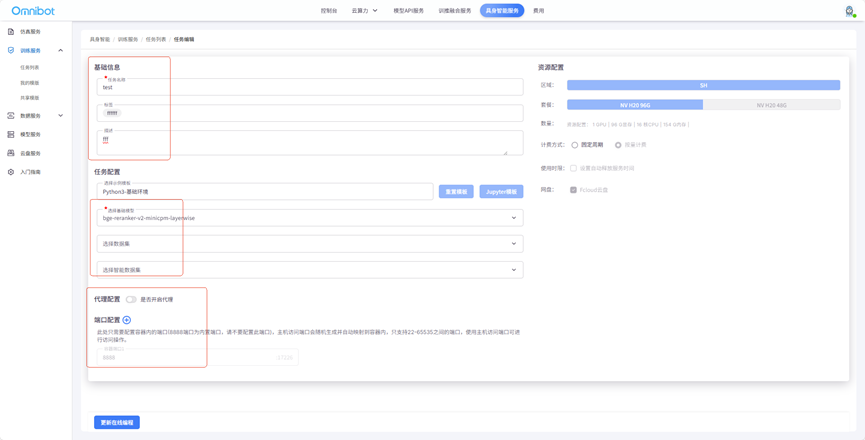
Save as template: When the user thinks the configuration of the current task has high reuse value, it can be saved as a template. When similar tasks are created later, they can be directly created based on the template, reducing the workload of repeated configuration.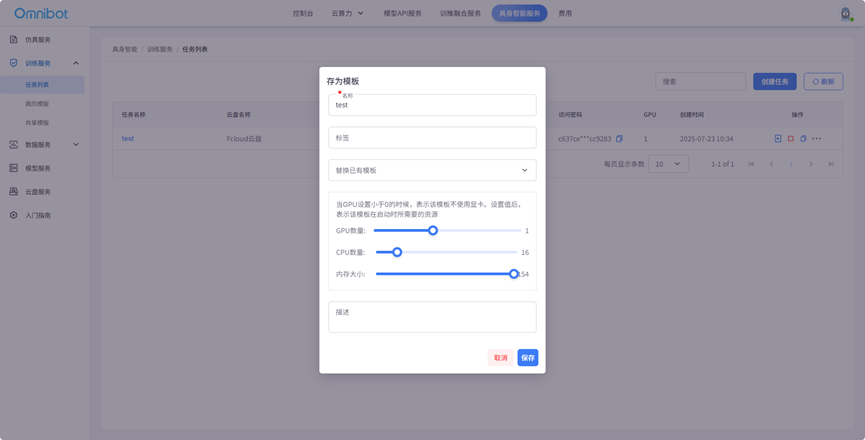
See the saved template in My Templates 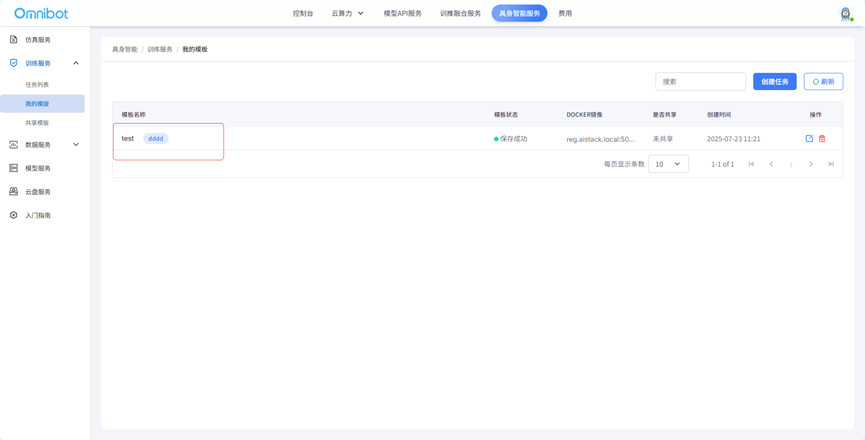
Generate application: This function is used to associate and bind the task with a specific application, so that the task can be executed in the environment of the specified application to meet the needs of different application scenarios.
Delete: If the task has been completed and no longer needs to be retained, click the "Delete" button to remove it from the system. Deletion should be performed with caution, as task-related data may not be recoverable after deletion.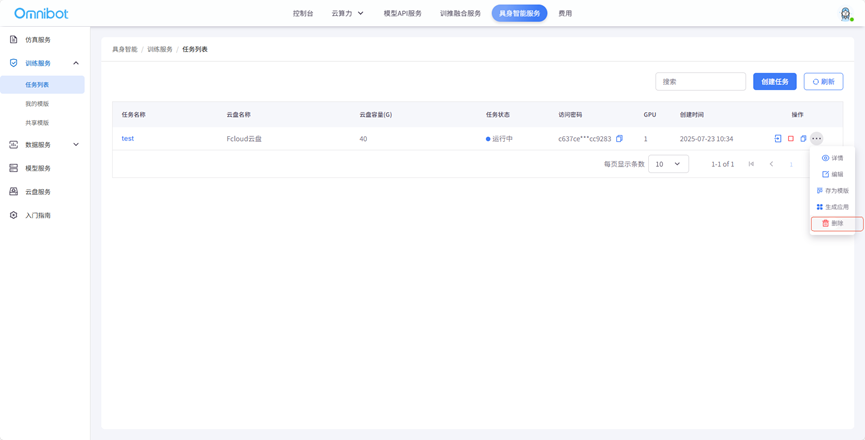
2. My template
In the list of templates, find the template that needs to be edited, click the edit icon in the corresponding template operation column, and then enter the "Edit Template" pop-up window interface 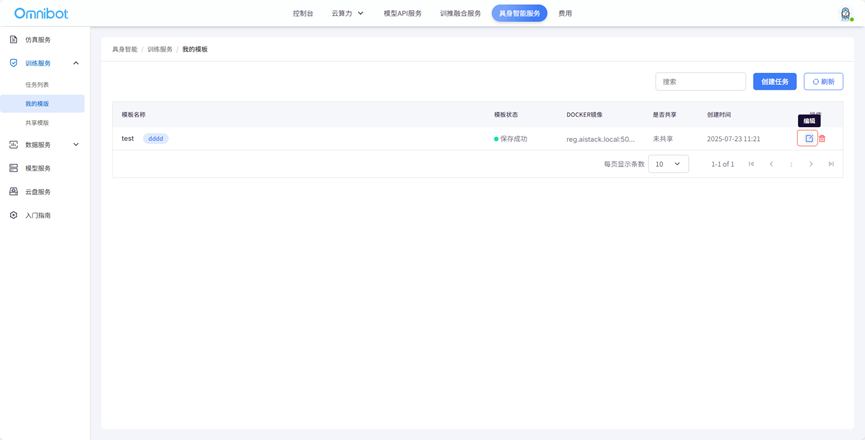
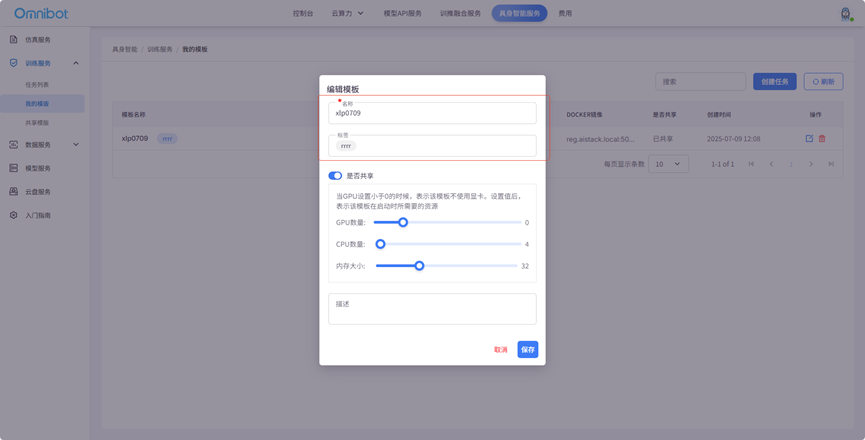
In the "Edit Template" pop-up window, find the "Name" input box, and click it to directly modify the name of the template. It should be noted that the name should accurately reflect the purpose or characteristics of the template, so as to facilitate subsequent identification and management. Click the "Label" input box to add, delete or modify the template label. Setting labels properly helps to classify and retrieve templates.
Through the "Share or not" switch, you can set the share attribute of the template. After sharing is enabled, other users may have permission to view or use the template; When sharing is turned off, only the current user can operate. 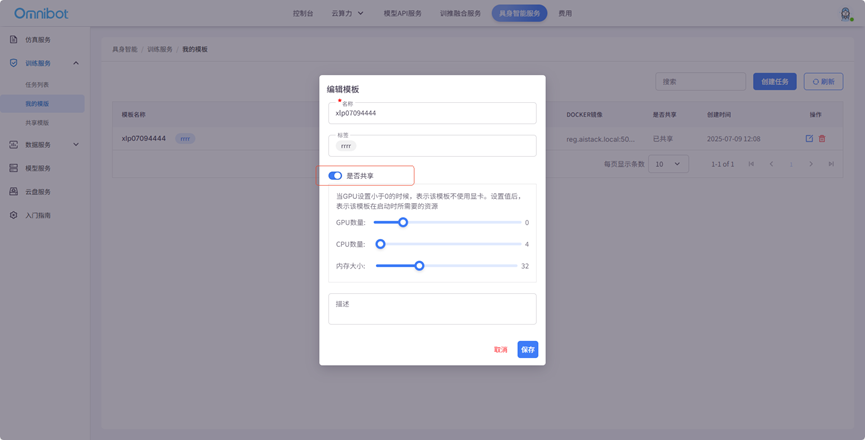
Number of Gpus: Drag the slider for the number of Gpus to adjust the amount of GPU resources needed when the template starts. When the GPU setting is less than 0, it means that the template does not use a graphics card. Number of cpus: Drag the slider for the number of cpus to set the number of CPU cores required for the template to start. Memory Size: Drag the memory size slider to configure the amount of memory needed for template startup.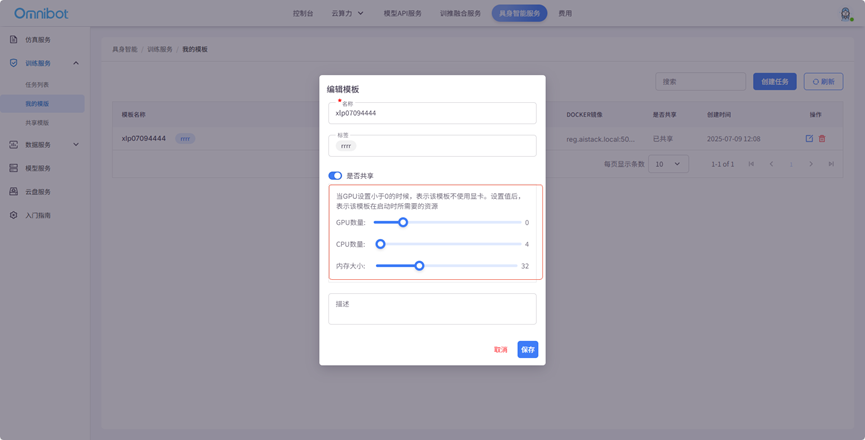
In the "Description" input box, you can describe the template in detail, including the function of the template, the application scenario, the use method and other information, so that other users or their own follow-up can quickly understand the template content. 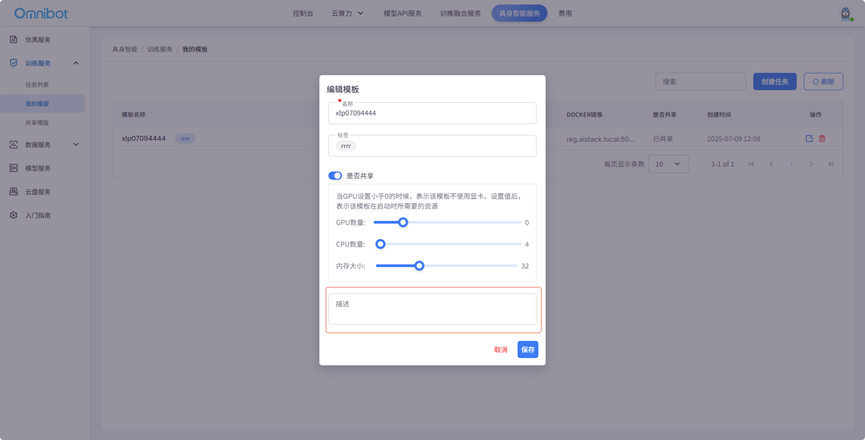
After all the parameters have been modified, click the "Save" button in the bottom right corner of the popup window, and the system will save the changes made to the template and update the template information.
3. My template
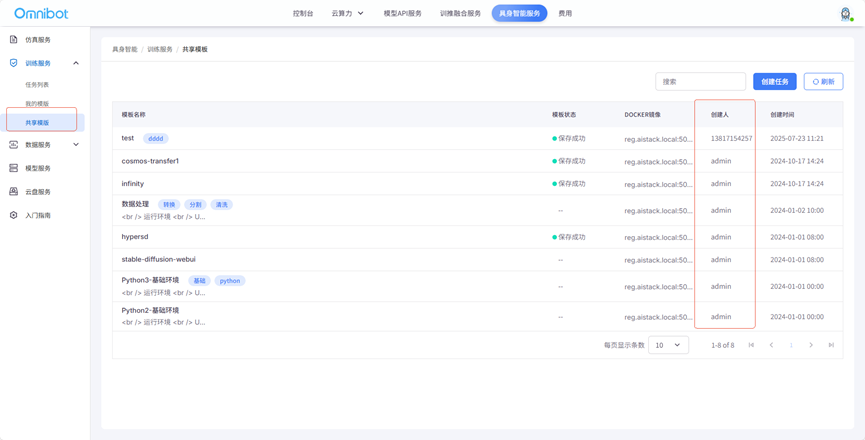
In the shared template, you can see the template information shared by all users.